A couple of weeks ago, at around seven in the morning, I received a text message from my auntie (who lives in the US) that went something like this: "OMG I just made vegan fried portobellos! Fattening but incredible, SOO GOOD! Call me for the recipe!" And call her I did. Now I am addicted! The good thing about this recipe is that it is oh-so-simple, customisable and SOO SOO GOOD!
Ingredients for the mushrooms:
- Your choice of mushrooms, as many as you can eat in one sitting (you should eat them straight after cooking)
- Oil for frying
- Plain flour
- Breadcrumbs (I get mine for $1.80 a bag from La Panella)
- Egg Replacer (I use Orgran's No Egg)
- Salt / pepper / onion powder / nutritional yeast / garlic salt to taste
Ingredients for the sauce:
- 1/2 cup mayo (I use Kingland brand)
- 1 1/2 tbsp of prepared horseradish
- 3/4 tbsp of dijon mustard
- salt and white pepper
First, make the sauce by mixing all the ingredients together and adjust to suit your taste. Set aside in the fridge.
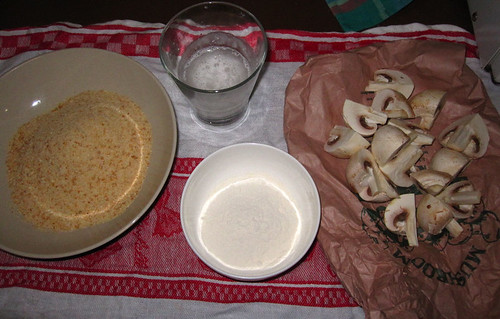
Next, set up three bowls - one with about a cup of flour, or enough to coat your mushrooms, and the second with about double the amount of breadcrumbs. (Salt, pepper, nutritional yeast, onion or garlic powder can be added to the breadcrumbs to give the breading extra flavour.) Mix up a few eggs' worth of egg replacer and put that in a small bowl or cup, deep enough to fully submerge the mushrooms.
For the mushrooms - if you used the cheapo white mushrooms, they can be kept whole or quartered, depending on how big they are. Portobellos or Swiss Browns should be sliced about 1/2" thick.
To bread the mushrooms:
1.) Fully submerge mushroom in egg replacer
2.) Transfer to flour bowl and coat in flour
3.) Submerge mushroom again in egg replacer
4.) Transfer mushrooms to breadcrumbs, cover in breadcrumbs and press them into the mushroom.
5.) Move breaded mushroom to a plate, ready for frying
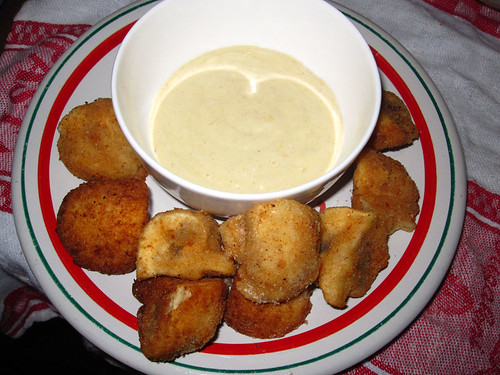
Bread all of your mushrooms, then heat up your oil. You can deep fry, or, if you're short on oil, shallow-fry. (I shallow-fry 'cos I'm cheap!) Fry the mushrooms until they are a crisp
golden-brown and fish them out with a fork or slotted spoon. The mushrooms should then be transferred to a plate lined with paper towel, to mop up excess oil. Sprinkle with garlic salt if you have some, otherwise just some salt flakes.)
Serve with the sauce and eat straight away!
